Facebook Ads
Meta Pixel Setup Guide (Step-by-Step for Accurate Conversion Tracking)

Category: Facebook Ads
Meta Pixel Setup Guide (Step-by-Step)
Running Meta Ads without proper tracking is like driving with your eyes closed. You may receive clicks, leads, or sales, but without accurate conversion data, it's impossible to know which campaigns are actually generating results.
That's where Meta Pixel comes in.
Meta Pixel helps you understand what visitors do after clicking your Facebook or Instagram ads. Whether they submit a lead form, purchase a product, or simply browse your website, the pixel records those actions and sends them back to Meta Ads Manager.
In this guide, you'll learn exactly how to set up Meta Pixel from scratch, verify that it's working correctly, and avoid common implementation mistakes. We'll also cover how to integrate it with Google Tag Manager and discuss best practices that improve campaign performance.
If you're looking for professional help with Meta advertising and tracking, explore our Meta Ads Management Services.
What is Meta Pixel?
Meta Pixel is a small piece of JavaScript code provided by Meta that is installed on your website. Once installed, it records visitor actions and sends that information back to Meta Ads Manager.
The collected data helps you:
- Track conversions
- Build remarketing audiences
- Create lookalike audiences
- Measure campaign performance
- Optimize campaigns for purchases, leads, or other events
Without proper tracking, Meta's algorithm has very little information to optimize your campaigns.
Why Meta Pixel is Important
Businesses that correctly configure Meta Pixel typically see better optimization over time because Meta learns which users are more likely to convert.
Benefits include:
- Accurate conversion tracking
- Better campaign optimization
- Improved ROAS
- Dynamic remarketing
- Custom audience creation
- Better reporting inside Ads Manager
If you're also running Google Ads, you should consider implementing proper conversion tracking so every marketing channel reports accurate data.
Prerequisites Before Setup
Before installing Meta Pixel, make sure you have:
- A Meta Business Manager account
- A Meta Ads account
- Access to your website
- Google Tag Manager (recommended)
- Google Analytics 4 (optional but highly recommended)
If you haven't created your campaigns yet, our guide on Google Ads Setup for Beginners can help you build a complete paid marketing strategy.
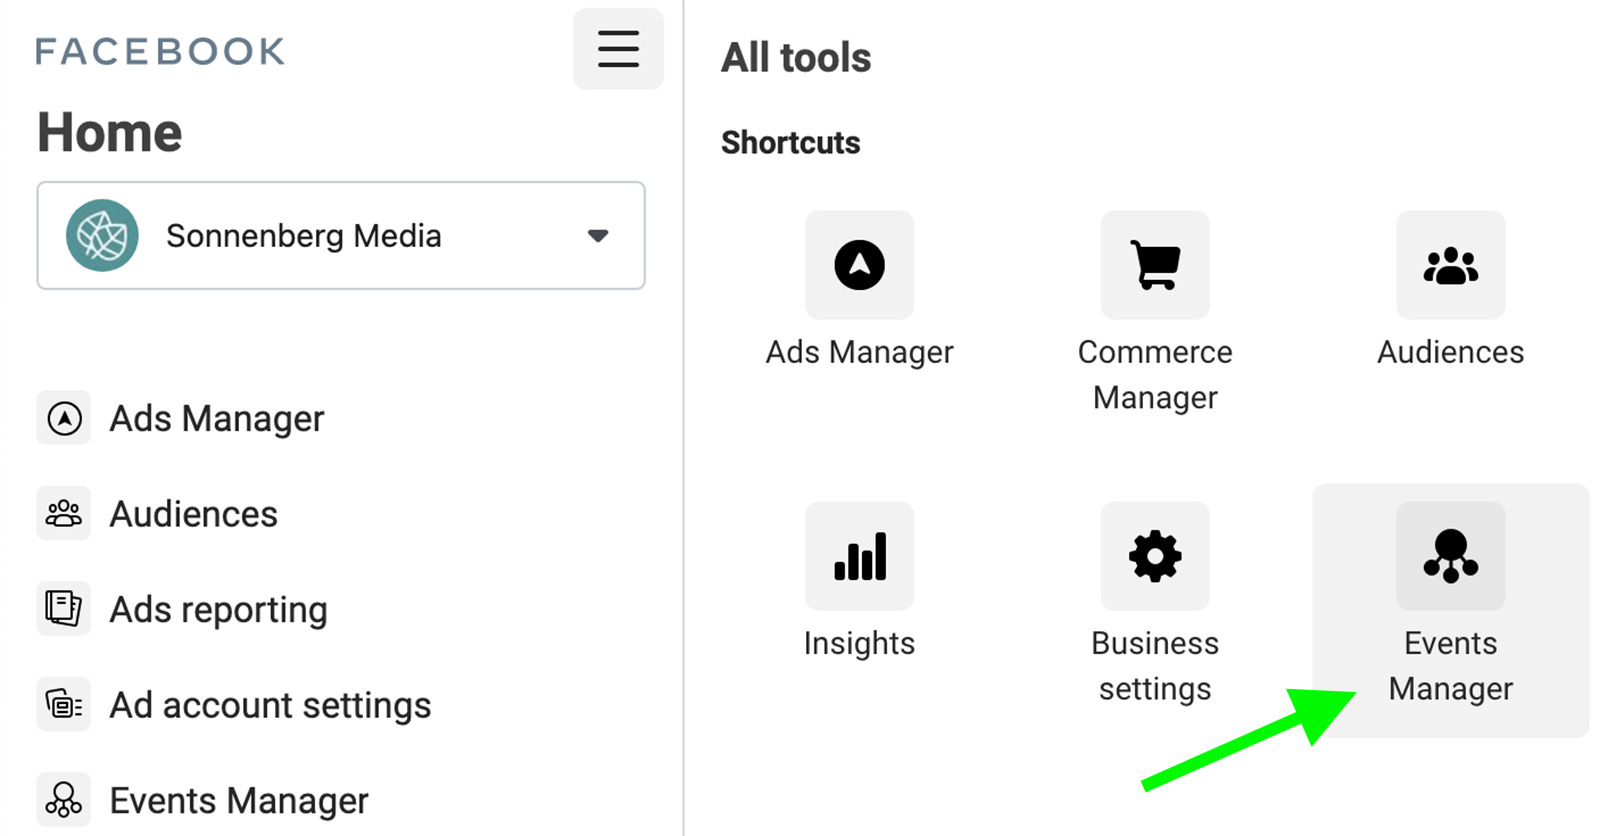
Step 1: Create a Meta Pixel
Log in to Meta Business Manager.
Navigate to:
Events Manager → Connect Data Sources → Web → Meta Pixel
Choose a name for your Pixel.
Example:
Scale With Clicks - Main Pixel
Enter your website URL and click Create Pixel.
Your Pixel ID will now be generated.
Step 2: Install Meta Pixel
Meta provides several installation methods.
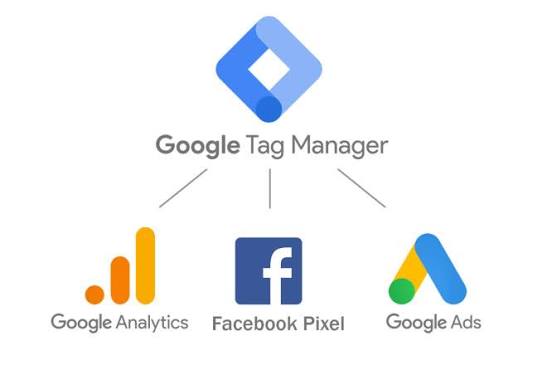
Option 1 (Recommended): Google Tag Manager
This is the preferred method because it's easier to manage tracking without editing website code.
Inside Google Tag Manager:
- Create a new Tag
- Choose Custom HTML
- Paste the Meta Pixel base code
- Trigger on All Pages
- Publish the container
Using GTM also makes future event tracking much easier.
If you haven't configured GTM yet, read our guide on GA4 and Conversion Tracking Setup.
Option 2: Manual Installation
If you don't use GTM:
- Open your website template
- Paste the Meta Pixel code inside the
<head>section - Save changes
- Publish your website
Step 3: Verify Pixel Installation
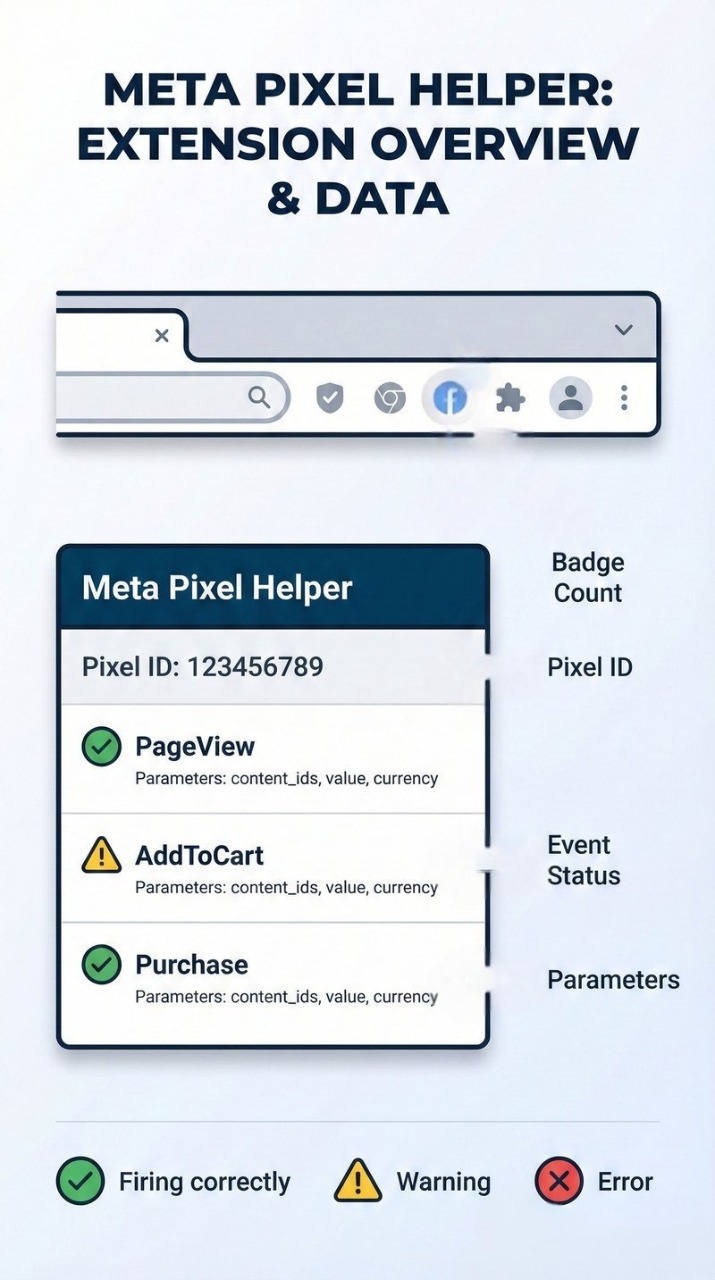
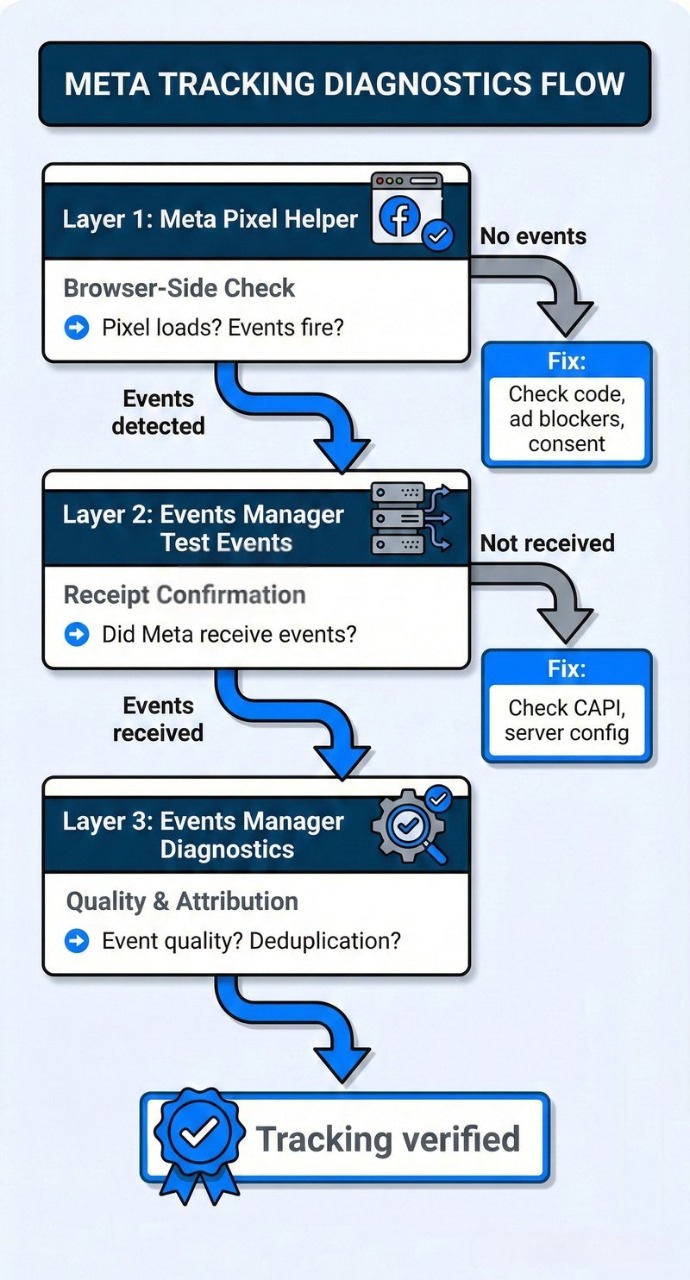
Install the Meta Pixel Helper Chrome Extension.
Visit your website.
The extension should detect:
- Pixel ID
- PageView Event
- Any errors or warnings
If everything is green, your Pixel has been installed successfully.
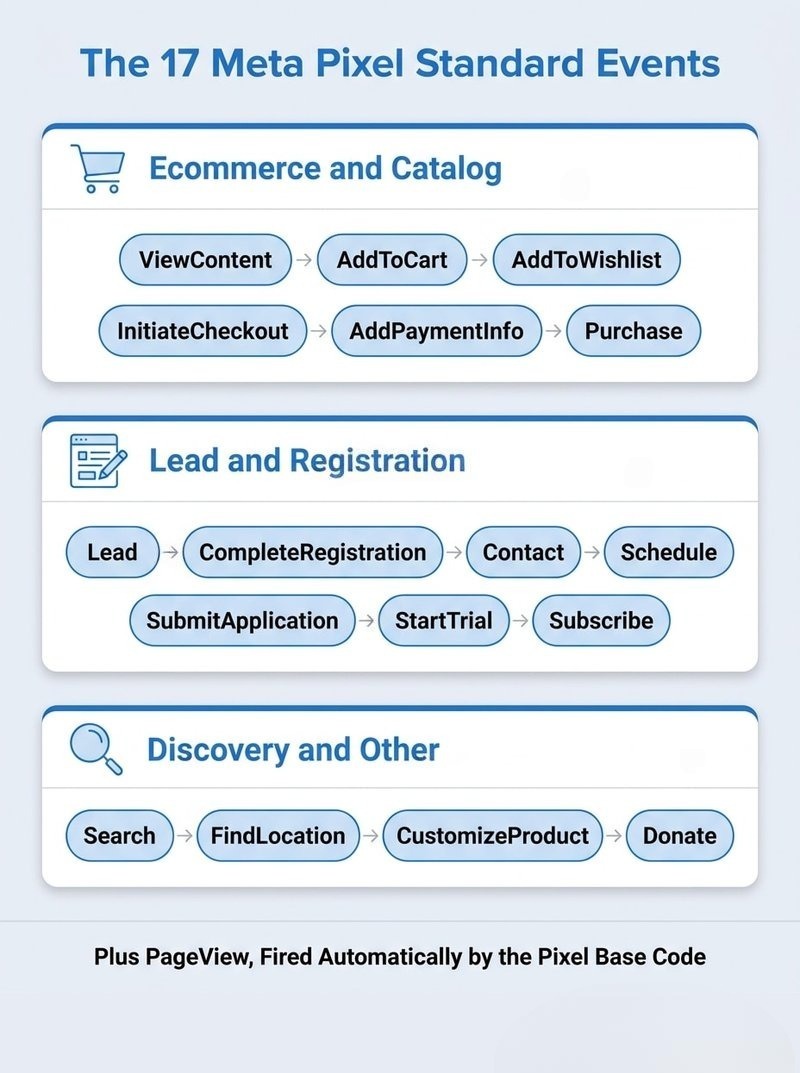
Step 4: Configure Standard Events
Tracking only PageView isn't enough.
You should configure events based on your business goals.
Common events include:
| Event | Purpose |
|---|---|
| PageView | Every page visit |
| ViewContent | Product or service page |
| Lead | Contact form submitted |
| Purchase | Completed purchase |
| AddToCart | Product added to cart |
| InitiateCheckout | Checkout started |
| CompleteRegistration | Signup completed |
Proper event tracking allows Meta to optimize your campaigns much more effectively.
Step 5: Test Events
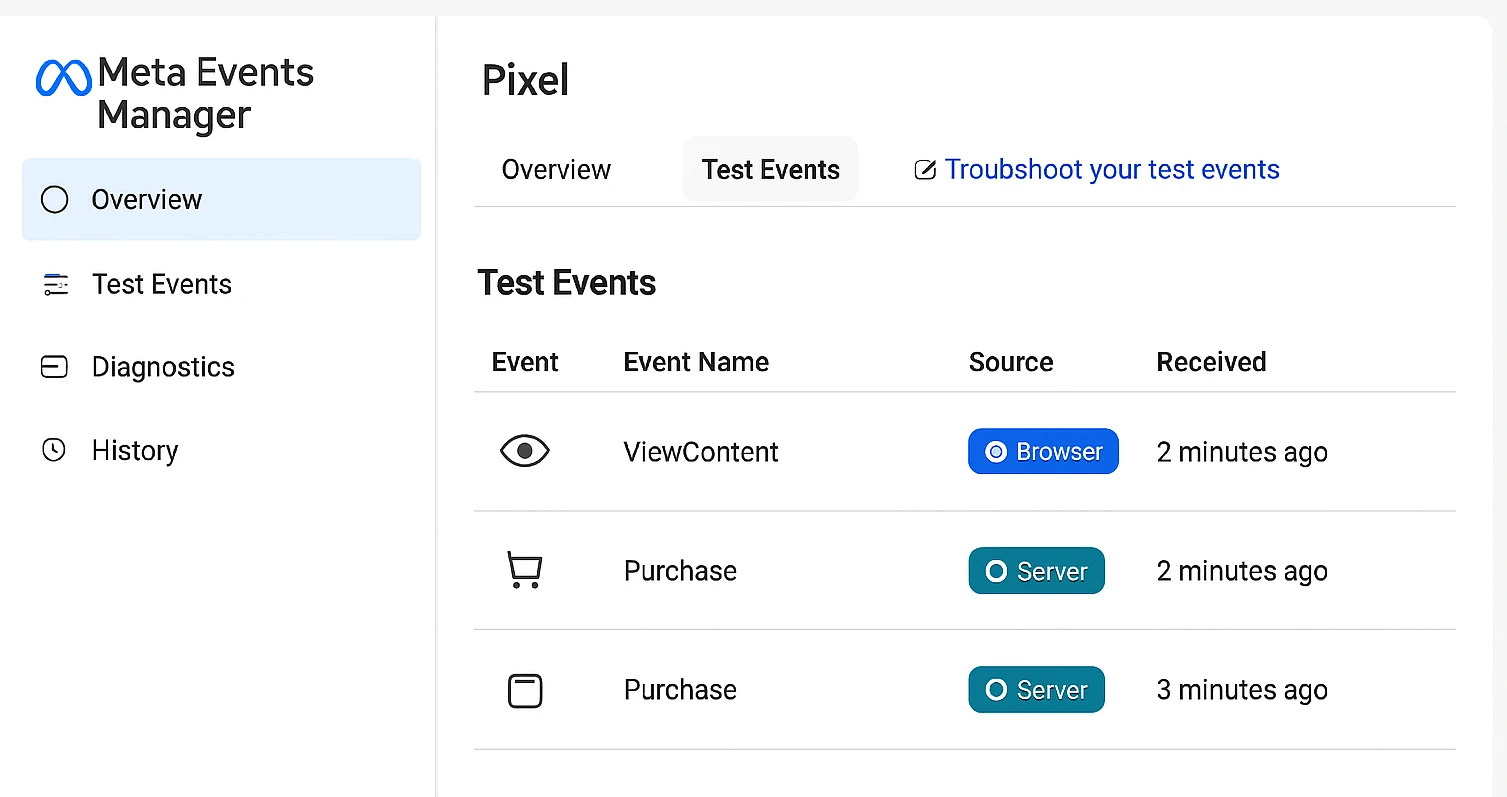
Open Events Manager.
Click:
Test Events
Visit your website.
Perform actions like:
- View pages
- Submit forms
- Complete a purchase
You should see events appearing in real time.
If events don't appear:
- Check GTM Preview
- Verify triggers
- Clear browser cache
- Disable ad blockers
Step 6: Set Up Custom Conversions
Standard events may not always meet your reporting needs.
For example:
Lead = Thank You Page
URL contains:
thank-you
Meta allows you to create Custom Conversions without additional coding.
These conversions can later be selected during campaign optimization.
Step 7: Verify Events with Diagnostics
Inside Events Manager:
Open:
Diagnostics
Meta automatically detects issues like:
- Missing parameters
- Duplicate events
- Invalid Purchase values
- Poor event quality
Fixing these improves optimization significantly.
Step 8: Add Conversions API (Recommended)
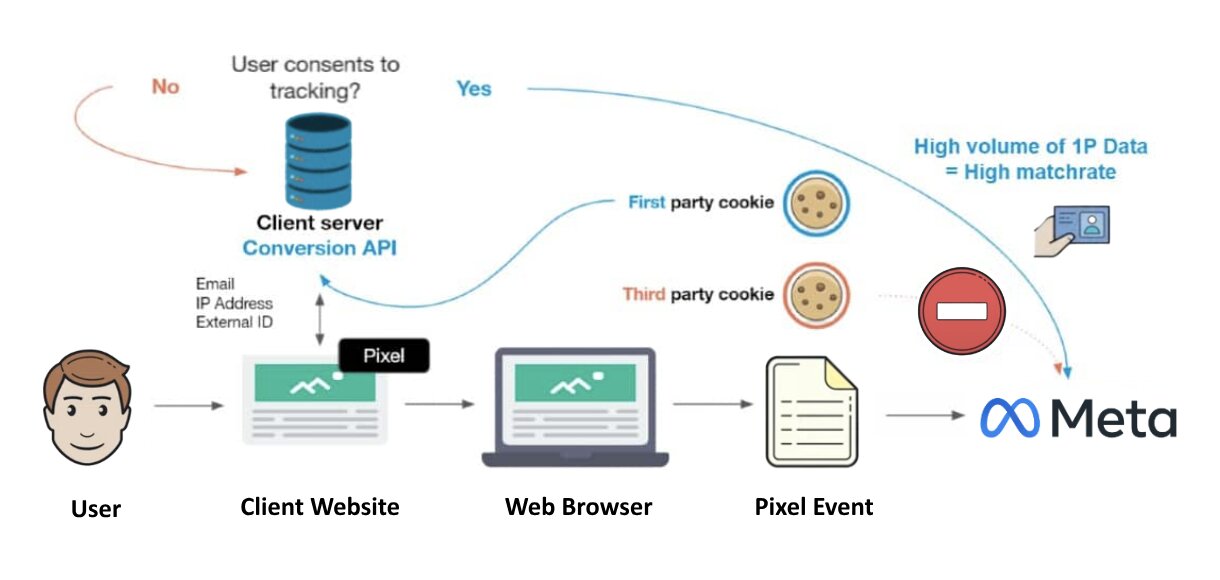
Browser tracking alone isn't always reliable due to:
- Cookie restrictions
- Ad blockers
- Browser privacy updates
Meta recommends implementing Conversions API (CAPI) alongside Meta Pixel.
Benefits:
- Better attribution
- Improved event matching
- More reliable conversion tracking
- Better campaign optimization
Using both Meta Pixel and CAPI together provides the most accurate reporting.
Learn more about advanced tracking through our Conversion Tracking Services.
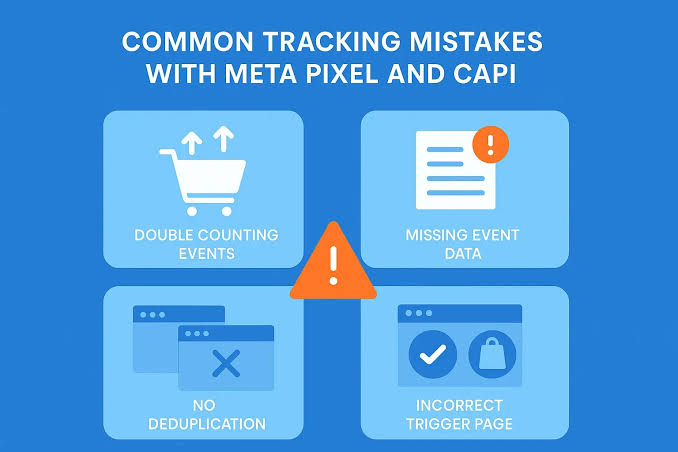
Common Meta Pixel Setup Mistakes
Many advertisers unknowingly make tracking mistakes that affect campaign performance.
Avoid these common issues:
Installing Multiple Pixels
Multiple pixels can fire duplicate events and inflate reporting.
Forgetting Purchase Value
Always send:
- Value
- Currency
Without these, ROAS reporting becomes inaccurate.
Duplicate Purchase Events
This often happens when:
- GTM fires twice
- Shopify plugins duplicate events
- Pixel and CAPI aren't deduplicated
Missing Lead Event
Many businesses only track PageView.
Always track the final conversion event.
Not Testing Before Launch
Always verify events before spending money on campaigns.
Meta Pixel Best Practices
For the best results:
- Use Google Tag Manager
- Enable Conversions API
- Track all important events
- Test every implementation
- Keep event names consistent
- Avoid duplicate pixels
- Review Diagnostics regularly
- Verify domains inside Business Manager
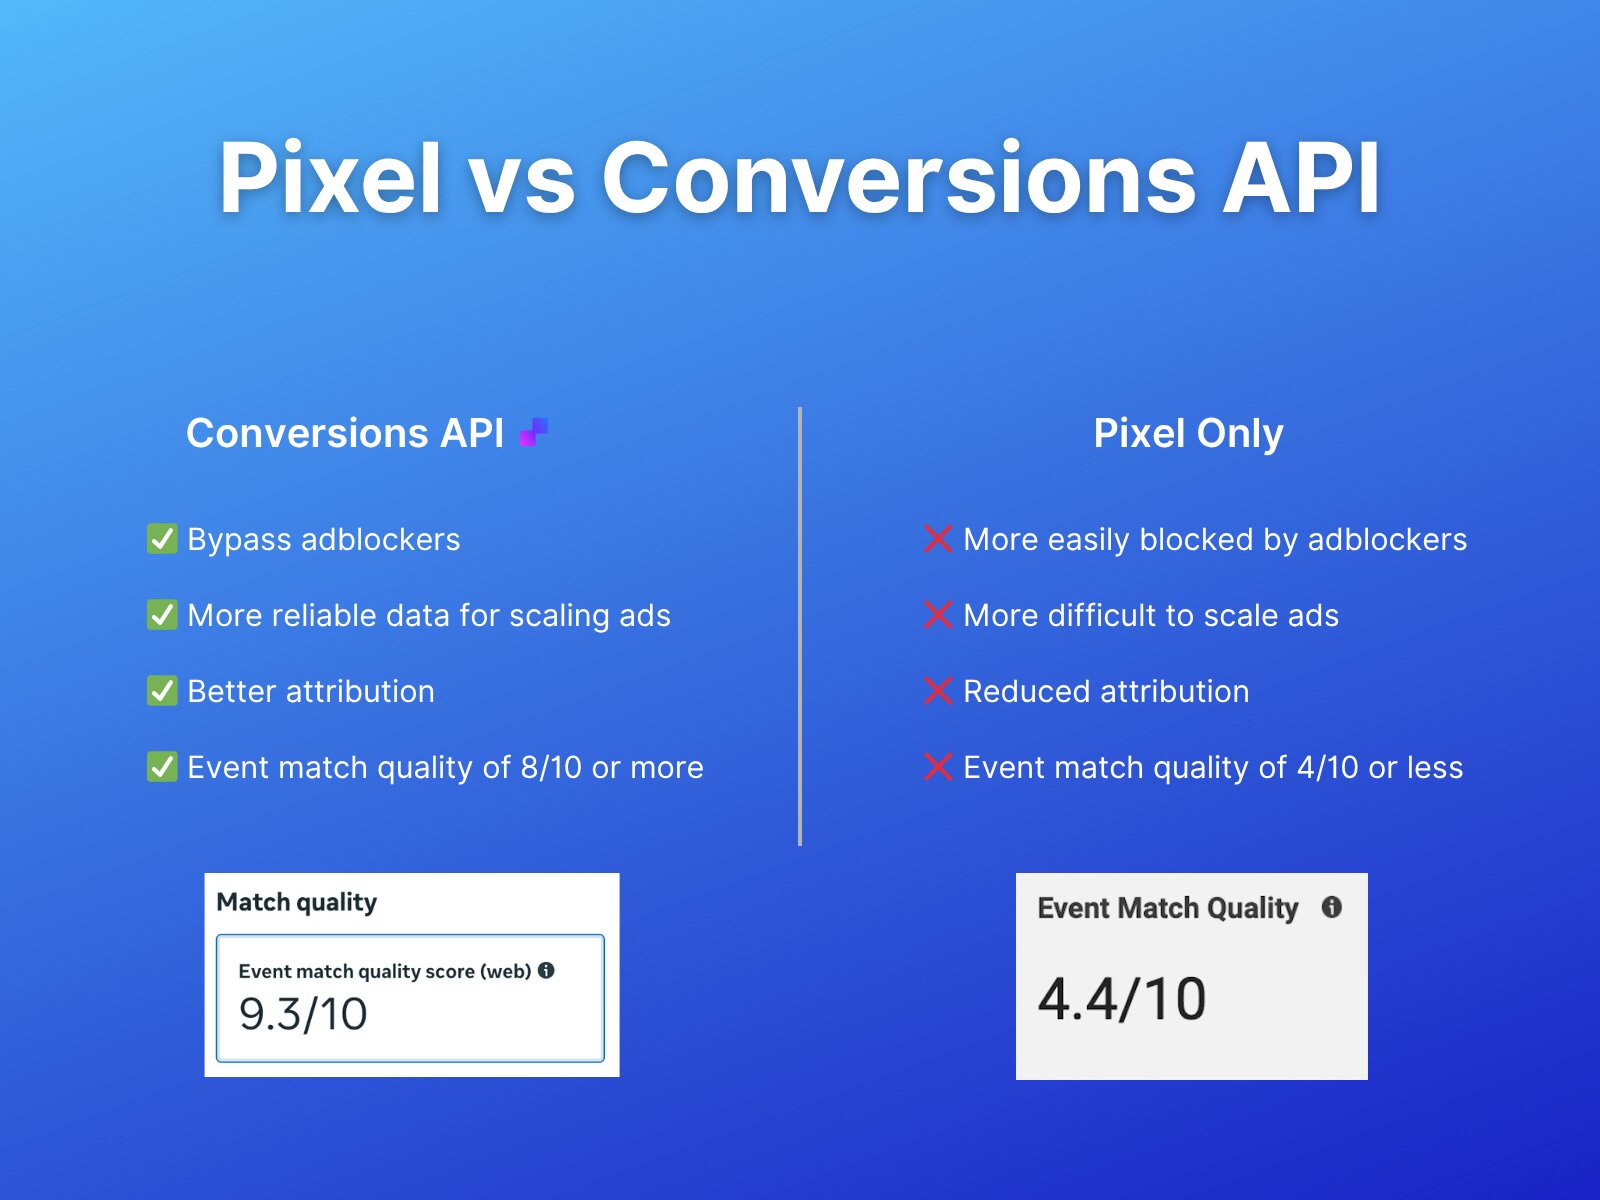
Meta Pixel vs Conversions API
| Meta Pixel | Conversions API |
|---|---|
| Browser-based | Server-based |
| Blocked by browsers | More reliable |
| Cookie dependent | Cookie independent |
| Easier to install | More advanced |
| Good tracking | Best combined with Pixel |
The recommended implementation today is Meta Pixel + Conversions API.
How Meta Pixel Improves Campaign Performance
Once Meta receives enough conversion data, it starts identifying users who are more likely to complete your desired action.
Over time this leads to:
- Lower Cost Per Lead
- Higher Conversion Rate
- Better ROAS
- Smarter audience targeting
- Improved campaign learning
This is why accurate tracking is one of the most important parts of successful Meta advertising.
Conclusion
A properly configured Meta Pixel is the foundation of successful Facebook and Instagram advertising. It helps you understand customer behavior, optimize campaigns using real conversion data, build high-quality audiences, and improve overall return on ad spend.
Whether you're generating leads, running an eCommerce store, or promoting local services, investing time in a correct Meta Pixel implementation will pay dividends through better campaign performance and more accurate reporting.
For businesses that want a fully optimized tracking setup—including Meta Pixel, Conversions API, Google Tag Manager, and GA4—our team at Scale With Clicks can help you implement everything correctly from day one.
Frequently Asked Questions
1. Is Meta Pixel free?
Yes. Meta Pixel is completely free to create and use. You only pay for your advertising campaigns.
2. Can I install Meta Pixel without Google Tag Manager?
Yes. You can install it manually by adding the base code to your website's <head> section. However, Google Tag Manager makes tracking easier to manage.
3. How do I know if my Meta Pixel is working?
Use the Meta Pixel Helper Chrome Extension and the Test Events section inside Meta Events Manager to verify that events are firing correctly.
4. What's the difference between Meta Pixel and Conversions API?
Meta Pixel tracks browser-side events, while Conversions API sends server-side events. Using both together provides the most accurate tracking.
5. Which events should every business track?
At a minimum, track:
- PageView
- ViewContent
- Lead
- Purchase (for eCommerce)
- AddToCart
- InitiateCheckout
The exact events depend on your business goals.